Connect with us


DIY Projects

Craft Your Own Stylish Pallet Coffee Table: A DIY Guide for Enthusiasts

REVIEWS AND GUIDES

Published

on

pallet table

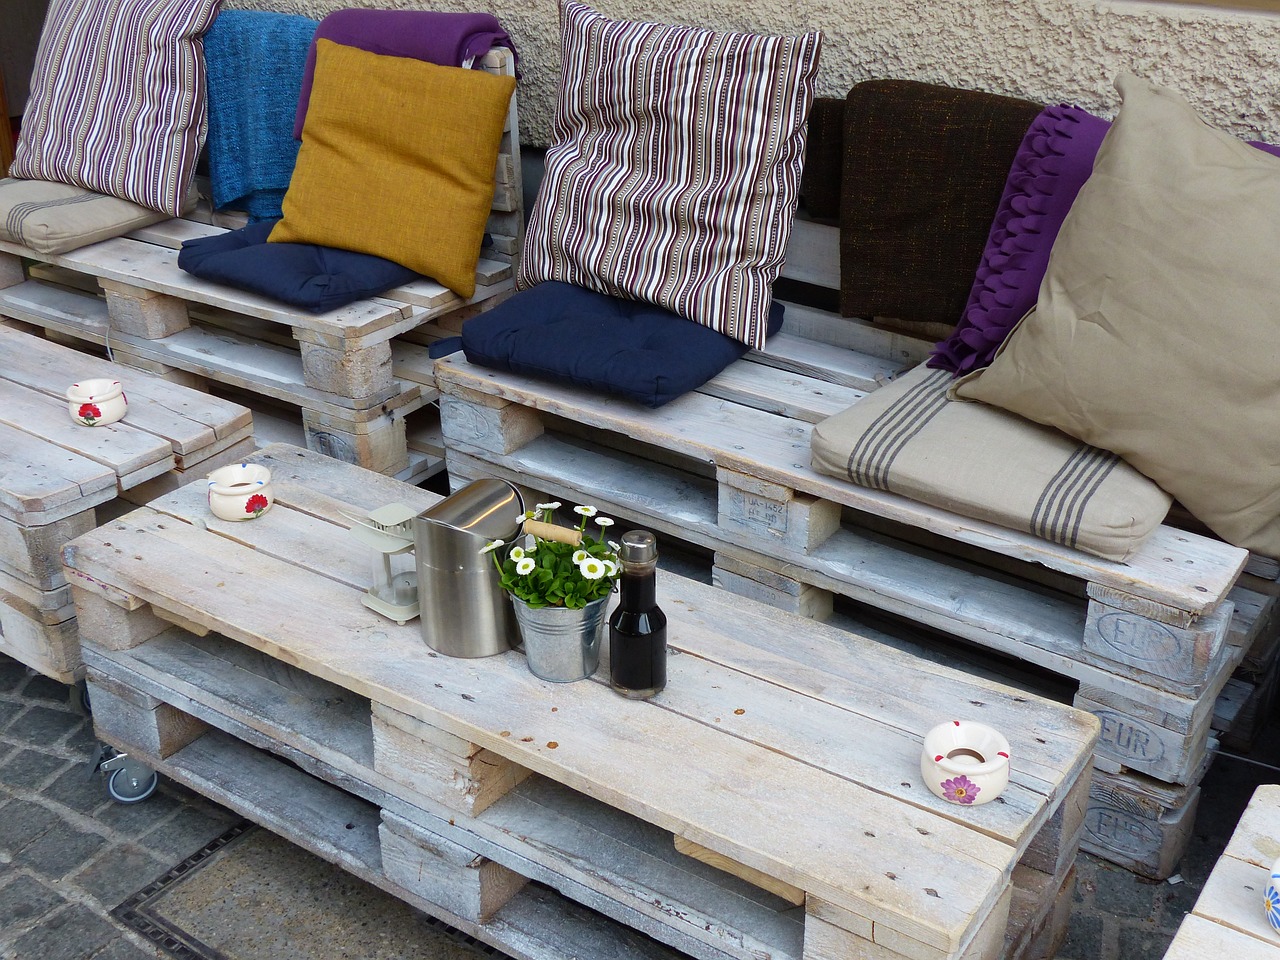
Looking to add a unique and rustic touch to your living room? Why not build your very own coffee table using reclaimed pallets? Not only is it a fun and rewarding DIY project, but it’s also an eco-friendly way to repurpose materials. In this step-by-step guide, we will walk you through the process of building a stunning pallet coffee table that will become the centerpiece of your living space.

Tools Required:

Before diving into the project, gather the following tools to ensure a smooth and successful construction process:

  1. Measuring tape
  2. Pencil
  3. Safety goggles
  4. Dust mask
  5. Work gloves
  6. Circular saw or reciprocating saw
  7. Power drill
  8. Screwdriver (both flathead and Phillips)
  9. Orbital sander or sanding block
  10. Clamps
  11. Hammer
  12. Chisel
  13. Wood glue
  14. Screws (1.5 inches and 3 inches)
  15. Paint or stain (optional)
  16. Paintbrush or foam roller (if painting or staining)

Step 1: Gather Your Materials

To build your pallet coffee table, you will need the following materials:

  • Wooden pallets (2 or more, depending on the desired size)
  • Plywood board (for the tabletop)
  • Sandpaper (medium and fine grit)
  • Wood stain or paint (optional)
  • Varnish or clear coat (if desired for a glossy finish)
  • Casters or furniture legs (optional)
  • Screws

Step 2: Disassemble the Pallets

Begin by carefully disassembling the pallets using a circular saw or reciprocating saw. Take caution and wear safety goggles and gloves throughout this process. Remove any nails or staples from the wood pieces.

Step 3: Prepare the Pallet Pieces

Measure and mark the desired dimensions for your coffee table using a measuring tape and pencil. Cut the pallet pieces accordingly, ensuring they are all of equal length.

Step 4: Create the Tabletop Base

Lay out the pallet pieces side by side to form the tabletop base. Make sure the boards are aligned and even. Use clamps to hold them together securely. If necessary, use a chisel to clean any rough edges.

Step 5: Secure the Base

Using a power drill and screws, attach the pallet boards together at the ends. Make sure to pre-drill holes to prevent splitting. Add additional support by attaching pallet boards across the width of the base at regular intervals.

Step 6: Sand the Surface

Once the base is secure, use an orbital sander or sanding block with medium grit sandpaper to smooth the surface. Sand the edges and corners to remove any splinters or rough spots. Switch to a fine grit sandpaper for a smoother finish.

Step 7: Create the Tabletop

Measure and cut a piece of plywood to fit the dimensions of the tabletop base. Sand the edges of the plywood and attach it securely to the base using wood glue and screws.

Step 8: Finishing Touches

At this stage, you can choose to paint or stain your coffee table to match your decor. Apply a coat of paint or stain evenly, following the manufacturer’s instructions. Once dry, apply a layer of varnish or clear coat for protection and a glossy finish.

Step 9: Optional Additions

For added functionality and style, consider attaching casters or furniture legs to the bottom of your coffee table. This will make it easier to move and provide a more polished look.

Step 10: Enjoy Your DIY Pallet Coffee Table!

Once all the finishes are dry and secure, it’s time to bring your DIY pallet coffee table into your living room. Admire your craftsmanship and enjoy the pride of having built a unique and sustainable piece of furniture.

Loading

DIY Projects

Crafting Natural Beauty: Build Your Own Stunning DIY Succulent Planter

REVIEWS AND GUIDES

Published

on

Succulent Planter

Succulent plants have become immensely popular due to their low-maintenance nature and unique aesthetics. Creating a DIY succulent planter allows you to showcase your creativity while providing a charming home for these beautiful plants. In this article, we will guide you through the process of building your own succulent planter, providing step-by-step instructions and a list of necessary tools. So, get ready to embark on a fun and rewarding journey of crafting a personalized succulent planter that will enhance the beauty of any space.

Tools Required:

  1. Measuring tape or ruler
  2. Pencil
  3. Safety glasses
  4. Dust mask
  5. Work gloves
  6. Power drill
  7. Hole saw drill bit (2-3 inches in diameter)
  8. Jigsaw or hand saw
  9. Sandpaper (medium and fine-grit)
  10. Paintbrush
  11. Paint or wood stain (optional)
  12. Protective finish (such as polyurethane or varnish)
  13. Screws
  14. Screwdriver or power screwdriver
  15. Wood glue or construction adhesive
  16. Clamps (optional)
  17. Succulent plants
  18. Potting soil
  19. Decorative pebbles or rocks
  20. Watering can or spray bottle

Step 1: Design and Planning Before you start building your succulent planter, decide on the design, shape, and size you want. Consider the available space, the number of succulents you want to accommodate, and the overall aesthetic you desire. Sketch out your plan, taking measurements into account. This will serve as your blueprint throughout the project.

Step 2: Cutting the Wood Using a jigsaw or hand saw, cut the pieces of wood according to your design. Ensure that the lengths and widths match the measurements specified in your blueprint. Remember to wear safety glasses and work gloves during this step.

Step 3: Sanding the Wood Once the wood pieces are cut, use sandpaper to smooth out any rough edges or surfaces. Begin with medium-grit sandpaper and gradually move to fine-grit for a polished finish. Wipe off any dust with a clean cloth.

Step 4: Preparing Drainage Holes Drainage is crucial for succulent plants to prevent root rot. Using a power drill fitted with a hole saw drill bit, create drainage holes in the bottom piece of your planter. Make sure to space the holes evenly to allow for efficient water drainage.

Step 5: Assembling the Planter Apply wood glue or construction adhesive to the edges of the wood pieces that will be joined together. Use clamps if necessary to hold the pieces firmly in place. Secure the joints with screws using a screwdriver or power screwdriver. Allow the adhesive to dry completely before moving on to the next step.

Step 6: Finishing Touches Now that the basic structure of your succulent planter is complete, you can add your personal touch. Consider painting the planter with your preferred color or applying a wood stain to enhance its natural beauty. Once the paint or stain is dry, apply a protective finish like polyurethane or varnish to safeguard the wood and add longevity to your planter.

Step 7: Planting the Succulents Fill the planter with potting soil, leaving enough space for the root systems of your succulents. Carefully remove the succulents from their nursery pots and gently loosen their roots. Place them into the planter, arranging them as desired. Ensure that the plants are adequately spaced to allow for growth.

Step 8: Adding the Final Touches To create an eye-catching display, cover the soil with decorative pebbles or rocks. This will provide a polished look to your succulent planter while aiding in moisture retention and preventing soil erosion. Once you’re satisfied with the arrangement, give the plants a light watering.

Conclusion: Congratulations! You have successfully crafted your own DIY succulent planter. By following the step-by-step instructions and using your creativity, you have created a stunning and personalized home for your beloved succulent plants. Enjoy the beauty and tranquility that these unique plants bring to your space. Remember to give them the care and attention they need to thrive, and your succulent planter will continue to be a source of joy for years to come.

Loading

Continue Reading

DIY Projects

Tweet Retreat: Building Your Own Stylish DIY Birdhouse

REVIEWS AND GUIDES

Published

on

birdhouse, DIY, build, birdhouse design, woodworking, backyard birds, birdhouse construction, DIY enthusiast, birdhouse plans, attracting birds, DIY birdhouse design ideas, birdhouse construction tips, how to build a birdhouse, woodworking for beginners, attracting specific bird species with birdhouses, choosing the right birdhouse dimensions, decorative birdhouse painting techniques, birdhouse maintenance guide, eco-friendly birdhouse materials, installing birdhouse pole or bracket

Birds are fascinating creatures, and having them visit your backyard can bring a sense of joy and tranquility to your outdoor space. One way to attract and provide a safe haven for our feathered friends is by building a DIY birdhouse. Not only does it offer a cozy spot for birds to nest, but it also makes for a fun and rewarding project for DIY enthusiasts. In this article, we will guide you through the step-by-step process of building a beautiful birdhouse that will surely become a sought-after address for your avian neighbors.

Tools Required:

Before we dive into the construction process, let’s gather the essential tools you’ll need to complete your DIY birdhouse project:

  1. Measuring tape
  2. Pencil
  3. Safety goggles
  4. Handsaw or jigsaw
  5. Drill with various drill bits
  6. Sandpaper (medium and fine grit)
  7. Screwdriver
  8. Clamps
  9. Hammer
  10. Paintbrushes
  11. Outdoor paint or wood stain
  12. Exterior-grade wood glue
  13. Screws and nails
  14. Ruler or straight edge

Materials Required:

To build a sturdy and visually appealing birdhouse, gather the following materials:

  1. 1/2-inch thick exterior-grade plywood or cedar boards (12 inches x 12 inches)
  2. 1/4-inch thick exterior-grade plywood or cedar boards (12 inches x 12 inches)
  3. 1/2-inch thick dowel rod (3/4-inch diameter, 8 inches long)
  4. Wood screws (1-inch and 1/2-inch)
  5. Nails (3/4-inch)
  6. Waterproof wood glue
  7. Exterior-grade paint or wood stain
  8. Birdhouse mounting bracket or pole

Step-by-Step Guide:

Now that we have our tools and materials ready, let’s begin constructing our DIY birdhouse:

  1. Design the birdhouse:
    • Start by sketching the design of your birdhouse. Consider the size and type of birds you want to attract, as different bird species prefer different hole sizes and house designs.
    • For a basic design, create a rectangular box with a sloping roof. A front entrance hole is essential, so determine the appropriate size based on your target bird species. A 1 1/2-inch diameter hole is suitable for many small songbirds.
    • Add a hinged or removable panel for easy cleaning and maintenance.
  2. Prepare the wood:
    • Using the measuring tape and pencil, mark and measure the dimensions of the birdhouse parts on the plywood or cedar boards according to your design.
    • Carefully cut the pieces using a handsaw or jigsaw. Remember to wear safety goggles while cutting.
  3. Assemble the birdhouse:
    • Begin by attaching the back panel to one of the side panels using wood glue and 1/2-inch screws. Ensure they are aligned properly and reinforce the joints with nails.
    • Attach the remaining side panel to the back panel in the same manner.
    • Next, attach the bottom panel to the assembled back and side panels, again using wood glue and screws.
    • Secure the front panel, leaving space for the entrance hole. Use clamps to hold the pieces together while the glue dries.
    • Install the roof by attaching the sloping piece to the top of the birdhouse using screws and glue.
    • Finally, attach the hinged or removable panel for easy access to the interior of the birdhouse.
  4. Add finishing touches:
    • Use sandpaper to smooth any rough edges or surfaces of the birdhouse.
    • Apply an exterior-grade paint or wood stain to protect the wood from weather conditions and add a touch of visual appeal. Allow sufficient drying time between coats.
  5. Install and enjoy:
    • Attach a mounting bracket or pole to the bottom of the birdhouse for easy installation in your desired location.
    • Hang or mount the birdhouse in an area with suitable vegetation and away from potential predators.
    • Keep a close eye on your birdhouse, providing fresh water and occasionally cleaning it to ensure a safe and inviting space for birds.

Loading

Continue Reading

DIY Projects

Dreamy Designs: Crafting Your Own Stunning DIY Headboard

REVIEWS AND GUIDES

Published

on

woman headboard

Are you seeking a creative way to revamp your bedroom without breaking the bank? Look no further than crafting a DIY headboard! A headboard can serve as the focal point of your bedroom, adding both style and functionality to your personal space. With a little imagination and some basic tools, you can create a headboard that perfectly matches your taste and decor. In this article, we will guide you through the process of creating a custom-made headboard that will leave you feeling proud and your bedroom looking fabulous.

Tools Required:

Before diving into the headboard project, make sure you have the following tools readily available:

  1. Measuring tape
  2. Pencil
  3. Circular saw or jigsaw
  4. Sandpaper (medium and fine grit)
  5. Electric sander or sanding block
  6. Clamps
  7. Screwdriver or drill
  8. Screws or bolts (appropriate size for attaching the headboard to your bed frame)
  9. Wood glue
  10. Upholstery foam (optional, depending on the design)
  11. Fabric of choice
  12. Staple gun
  13. Scissors
  14. Level
  15. Paint or stain (if desired)

Step 1: Measure and Plan

Start by measuring the width of your bed frame to determine the ideal size for your headboard. A typical headboard should be slightly wider than the bed frame for a balanced look. Consider the height of the headboard as well, ensuring it complements the overall scale of your room. Once you have your measurements, sketch out a design plan for your headboard, taking inspiration from various styles, such as rustic, modern, or vintage.

Step 2: Gather Materials

Based on your design plan, gather the necessary materials. This may include plywood or solid wood for the main structure of the headboard, foam for padding (if desired), fabric to cover the headboard, and any additional decorative elements, such as buttons or trim. Head to your local hardware or home improvement store to pick up the required materials, keeping your measurements handy to ensure you purchase the correct quantities.

Step 3: Build the Headboard Frame

Using your chosen wood material, cut out the shape of your headboard using a circular saw or jigsaw. Take your time and follow your design plan, ensuring smooth and precise cuts. Sand the edges of the wood to remove any roughness or splinters, using medium and fine grit sandpaper. If desired, paint or stain the wood to match your bedroom decor and let it dry completely.

Step 4: Upholstering the Headboard

If you prefer a padded headboard, now is the time to attach the upholstery foam. Measure and cut the foam to fit the dimensions of your headboard. Apply wood glue to the back of the foam and carefully press it onto the headboard, ensuring even coverage. Allow the glue to dry according to the manufacturer’s instructions.

Next, lay your chosen fabric on a clean, flat surface, facing down. Place the headboard on top, ensuring the foam side is in contact with the fabric. Begin stapling the fabric to the back of the headboard, pulling it taut to create a smooth and neat appearance. Trim any excess fabric, leaving a clean edge. Take extra care when stapling around corners or curves, ensuring the fabric remains even and wrinkle-free.

Step 5: Mount the Headboard

Now that your DIY headboard is complete, it’s time to mount it to your bed frame. Position the headboard against the wall where you want it to be placed, ensuring it is level. Use clamps to hold the headboard in place while you attach it to the bed frame. Depending on your bed frame’s design, you may need to use screws or bolts to secure the headboard firmly.

Step 6: Finishing Touches

To add a touch of personalization, consider attaching decorative elements such as buttons or trim to your upholstered headboard. These small details can elevate the overall aesthetic and make your DIY headboard truly unique. Be creative and experiment with different options until you achieve the desired look.

Creating a DIY headboard allows you to showcase your creativity while transforming your bedroom into a stylish sanctuary. With the right tools and materials, you can bring your design ideas to life and enjoy a one-of-a-kind headboard that perfectly complements your personal style. Whether you opt for a sleek modern design or a cozy, rustic look, crafting your own headboard will undoubtedly add charm and personality to your bedroom.

Loading

Continue Reading

Loading

Trending